Editing a join
After a join has been set up, you can edit it at any time as required. To do this:
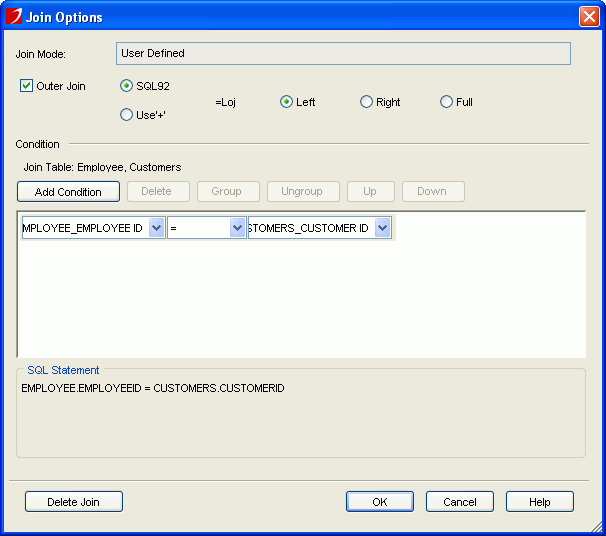
- In the Business Cube - Join Editor window, right-click the join in the All Joins box and choose Edit Join (or double-click its join button
 in the right panel). The Join Options dialog appears. See the dialog.
- Check the Outer Join option to set the join an outer join, then specify the format of the join as required: SQL92 or Use'+'.
- Edit the join conditions in the Condition panel according to your requirements.
- When done, click OK to accept the changes.
See also Join Options dialog for details about options in the dialog.
Besides, if you find that some joins are unnecessary or their names are not intuitive, you can delete or rename them.
- To delete an existing join, right-click the join in the All Joins box and choose Delete from the shortcut menu (or click the Delete Join button in the Join Options dialog).
- To rename an existing join, right-click the join in the All Joins box and choose Rename from the shortcut menu. The name of the join will then become editable. Enter a name in the name box and press Enter on your keyboard (or click somewhere outside the box).